There’s no way around it – spring cleaning takes work. But if you’ve been following our 31-day Spring Clean Challenge, you know that the most effective way to tackle a big job is to turn it into several smaller jobs. Well, here are eight more time-saving tips to help you along.
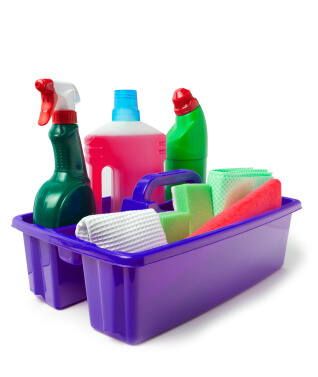
Put together a cleaning caddy to keep your cleaning supplies close by (istockphoto)Make a cleaning caddy You can find these handy organizing buckets at most hardware stores. Fill the caddy with multipurpose cleaners, microfiber cloths and dish soap. That way, you’ll always have your basic cleaning tools on hand as you move about the house.
Find a place for everything Tackle large piles of clutter by subdividing the task into smaller pieces. Label a set of Rubbermaid containers with general areas in your home – kitchen, bathroom, laundry room, bedroom, office, garbage etc. Before you begin cleaning a room, place clutter into the appropriate box and place the box it in the room where the items belong. Once you’ve finished your cleaning for the day, sort through each box and find a home for your stuff. Repeat as necessary. (This is also a good way to sort through items when planning a garage sale.)
Move your furniture and appliances just enough to clean around them Unless you’re steam cleaning the carpets, there’s no need to clear a room of all furniture before you start. When vacuuming, simply move those big items a little to the left or to the right, vacuum the area previously occupied by the furniture and then move it back into place. As an additional task: check the pads on the feet of your chairs and couches, and replace any that are dirty to prevent scratching your floors.
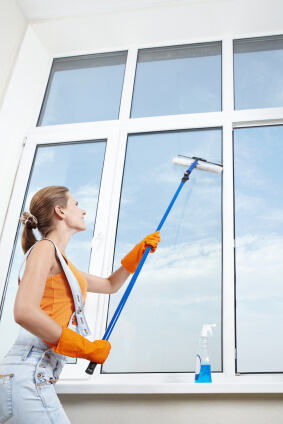
A squeegee is your best friend when it comes to washing windows (istockphoto)Use all the tools in your cleaning armada Do you use the attachments that came your vacuum cleaner? You should. The upholstery brush attachment is perfect for cleaning cushions and drapes, while the crevice attachment can get into tight spots with ease. You can also use an extending rod to clean up high. And when cleaning windows outside, save time (and a small fortune in paper towels) by using a squeegee with a pole attachment.
Let water do your work Metal and plastic blinds can be removed from the window and cleaned outside. Scrub down the blinds with soapy water, then spray them clean with a garden hose. Lay the blinds flat on a towel to dry in the sun. Garbage cans, plastic furniture and toys can also be hosed down. Doing the work work outside will prevent you from accidentally bringing dirt and grime back in your house.
Make a lost and found box Don’t waste time fretting about where to put that orphaned sock or how to neatly arrange your collection of extra shirt buttons. Instead, set aside a container for items that have no obvious home. Then you can resume your cleaning duties and worry about the little details later.
Identify and eliminate clutter hotspots My personal hotspot is right next to the microwave on the kitchen counter. It’s a magnet for pieces of mail, flyers, old receipts and other documents I’m too lazy to sort. The trick to keeping such spaces clean is to remove the temptation; once you’ve cleared a hotspot, put something in its place – a lamp, a vase with some flowers or an art object – to block the clutter from re-appearing
Get rid of dust at the source A lot of the dust in your house gets recirculated by dirty air filters, vents and fan blades. Remove dust and dirt from ceiling fans and air-conditioner vents with a cloth and a vacuum with a soft nozzle attachment. Replace your air filters regularly, according to the manufacturer’s instructions.
Goodbye, snow and slush. Hello, water and muck.
Your floors never get a break, no matter the season. Whether you’ve got hardwood, ceramic or vinyl underfoot, follow these tips to keep your floors properly maintained year-round.
(Too busy to clean your floors? Goldstar Cleaning can help with all your floor-care needs.)
Stripping and waxingYour floor puts up with a lot, from dirt to pet hair. Make sure to return the favour by cleaning your floor regularly.
Floors with a wax finish should have the wax stripped and then reapplied at least once a year to maintain their shine and protect the floor from damage. There are different kinds of wax strippers for hardwood, vinyl and masonry (ceramic or stone) flooring; check with your local cleaning supply store to find the right kind for you.
(Note: wax strippers are toxic and give off fumes. Be sure to use wax stripper in a well-ventilated area, and wear rubber gloves when handling.)
To strip wax, apply a layer of stripper to a small area of floor, then wipe the area with a scrubbing pad to remove the waxy buildup. Use a scrub brush or a toothbrush to remove wax from corners and hard-to-reach areas. Use a putty knife to remove large wax deposits.
Once the old wax has been removed, it’s time to apply a new layer. Apply the wax sparingly directly on the floor, and spread it into a very thin coat using long, straight strokes with a wax applicator or sponge mop. Open windows, and let dry to a shine. Apply two or three thin layers of fresh wax, being sure to allow each coat to dry thoroughly before applying the next.
Buff your floor between wax applications to remove scratches and keep the surface looking radiant.
Vacuuming, mopping and sweeping
Regular vacuuming or sweeping will remove surface dirt from your floor. It also makes mopping and waxing less arduous.
In addition to vacuuming, you should wipe your floor with a rag mop once a week to clear away surface stains. For vinyl, laminate and masonry floors, try a mixture of one part water, one part alcohol, one part vinegar and a few drops of dish washing liquid. Fill a spray bottle with the mixture spray, the floor, and mop. The alcohol sanitizes and helps dry the floor quickly, while the vinegar and dish washing liquid cuts through the dirt and grease with ease.
Daily care for your floor
Floors can be divided into two varieties: those that you can get wet, and those that you can’t. A wax finish does not make your hardwood floor water-proof. Wipe spills with damp paper towels as soon as they hit the floor, and buff the area with a soft, dry cloth.
Avoid dragging furniture across your floor, which can scratch the surface. Attach felt or nylon glides to the legs of heavy furniture items, and check the glides occasionally for dirt, which can also scratch. Use area rugs or mats in high traffic areas like vestibules.
We use cookies to ensure that we give you the best experience on our website. If you continue to use this site we will assume that you are happy with it.