Shop

How A Site Survey Could Help Your Business

Looking for a Commercial Cleaner – Book a Site Survey First!

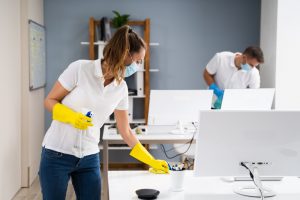
When considering outsourcing the cleaning of your commercial space be sure to book a site survey of your premise first. The opportunity to walk through your space with your professional cleaners is an invaluable step in ensuring a successful partnership before the work begins. And could save you the loss of time and money in the future from miscommunication and unmet needs.

office cleaners

What Do We Look at In Our Site Surveys?

With almost 20 years in the industry, we at Goldstar know that each client partnership and each cleaning job is unique. So, we use the site survey of your commercial space to make sure we are on the same page from day one and that your facility’s unique needs are met. And continue to be met. During our site survey you can expect us to assess the following when looking at the areas to be cleaned.

  • The Types of Surfaces
  • Volume of Traffic
  • The Types of Soils Present
  • Current process and methods for Cleaning/Maintenance
  • Goals and needs for Cleaning process
  • Improvements to current cleaning process

Next: A Right Plan of Action

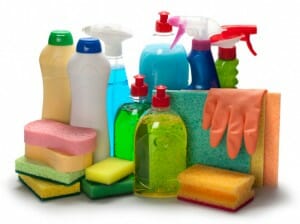
Once the above is assessed and discussed, you want to make sure your professional cleaners also have the right products and the right equipment to fulfill your goals and needs. Not all cleaning products are the same and a site survey will allow an accurate assessment of the soils in your workspace that needs to be addressed. The right product or purpose cleaner for your area will provide your establishment a higher quality clean, in the most time-efficient manner. Having the right equipment for the job is also essential in making this happen. Different types of flooring and the size of your premise may require different plans of actions.

office cleaners

Let’s Work Towards the Same Goal

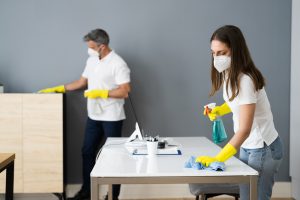
Our years of expertise in commercial cleaning has given us a great understanding of many different environments and solutions for tackling daily and long-term cleaning goals. We use our site surveys to tailor a unique and comprehensive cleaning plan for your commercial facility. By working closely with you we will determine what your goals are and what works best for you. A site survey will help us find the best solution for your facility which will result in improved results. So, your business can focus on its business!

Call Goldstar Cleaning Services Group at +1 (250) 423-4029 now to inquire about a site survey of your commercial facility to see what we can do for you!

The Difference Between Cleaning, Disinfection and Sanitization

Cleaning up – The 3 Sisters

Understandably cleaning, disinfection and sanitization may have just been words to you over a year ago but have now become very significant topics. Even with their common usage in daily public messaging there can be a tendency to group the them together as the same thing. What is the difference? And how can they help you keep your workplace safe?

House-Cleaning-Supplies

Meet the Three Sisters (Our Fernie Pun) of a Healthy and Clean Environment

Cleaning: The Older Sister

The one you have probably known the longest. Simply put, cleaning is the removal of dirt, germs and impurities from surfaces and objects. It alone, does not kill germs. But fewer germs on surfaces can decrease the spread of bacteria. Tried, tested and true, but for deeper cleans and to stop the spread of viruses and pathogens, she needs to call in her sisters.

Sanitizing: The Middle Sister

Sanitization of surfaces and objects, especially high touch areas, kills and reduces the number of germs and pathogens to a safe level that is determined by public health standards. And is a requirement to operate by making sure surfaces are ‘touch-safe”. But it does not kill all germs.

Disinfecting: The New Kid

Disinfecting is the application of specific and stronger chemicals to kill ALL germs and pathogens on surfaces and objects. In our current health crisis, it is the most effective means to stop the spread of illness causing germs and infections.

How can this help your business? No matter what type of commercial facility you have, keeping it clean and germ-free, so that it can continue to operate successfully and safely is crucial to its success and a community responsibility.

A commercial cleaning service provider has access to the most up to date disinfection technology and equipment necessary to provide you the most effective clean and help reduce the spread of illness causing germs. Putting both you, your employees, and customers mind at ease, knowing their well being and safety is being professionally taken care of.

employees at a board table

Let us do our job so you can do yours!

Have questions about our methods of cleaning, sanitizing, or disinfecting for commercial facilities? Need COVID-19 cleaning help from professionals?

Want to set up regular cleanings or project services to improve your commercial facility?

Contact us at Goldstar Cleaning Services Group today!

Goldstar logo

Indoor Plants and Your Winter Space

Indoor Plants to Brighten Your Winter

While the mountains and fresh powder can keep us all pretty happy in the Kootenays during the winter, the shorter days and colder temperatures tend to drive us inside more at this time of year. Studies have shown the many benefits indoor plants can bring to a home or workspace, such as helping to clean the air, reduce stress and anxiety, and boost creativity and productivity.

Here is a list of some great options to both brighten and clean your home or workspace, and continue to enjoy nature while inside this winter.

The ZZ Plant: (Harry Potter Spell Name: Zamioculcas zamiifolia)

This is the current Instagram darling of the plant world at the moment and one that we think is a great winter indoor option due to how low maintenance it is and drought tolerant. It thrives when it is generally left alone and requires infrequent watering. Best placed in a room with minimal light; it has great versatility to survive in many different rooms throughout this season. Bringing you some beauty with its rich green colour, while also removing toxins from the air, such as benzene, formaldehyde, xylene and toluene.

snake plant

Snake Plant: (Harry Potter Spell Name: Dracaena trifasciata)

One of the most famous of indoor plants before the ZZ Plant got its following is the Snake Plant, also commonly known as ‘Mother-in-law’s Tongue’. This is due to its reputation of being both durable and tough natured. Again, a great option as it also requires little attention, and infrequent watering, especially in the winter. Another air purifier for your space, its long, green stiff leaves can range from 2-6 feet depending on the variety. Look at the dwarf varieties of the “Whitney” or “Future Superba” for smaller options if you prefer. Perfect for low-light rooms as it prefers indirect sunlight. Handles well in dry air or overly-heated winter spaces.

Aloe Vera: (Harry Potter Spell Name: Aloe Vera – that’s how low maintenance it is)

A staff favourite at Goldstar, this succulent is another tough cookie, and can even bounce back from the worst of neglect and requires infrequent watering. So much so, that with succulents, like Aloe Vera its better to almost not water them through the winter. Even with the little attention you give it, it will continue to remove formaldehyde from the air while serving you tropical, desert vibes. And its great for your skin with its natural anti-inflammatory and anti- bacterial properties. This sun loving baby prefers a bright sunny spot. Perfect for a dry window.

Spider Plant: (Harry Potter Spell Name: Chlorophytum Compsum)

This green beauty is the strongest air purifier in the list. A NASA study done to test household plants and their ability to remove toxins from the air, found the Spider Plant to surpass the others, removing about 95% of toxins in preliminary tests. It also differs from the rest on the list by being pet friendly. While it needs bright light, it prefers not to be in direct sunlight. Perfect for a room with big windows. They also love humidity, so are a great option for over-heated winter spaces or bathrooms. Only needs watering about once a week, just make sure the soil has been dried out between waterings.

spider plant

Peace Lily: (Harry Potter Spell Name: Spathiphyllum)

This tropical plant loves living in the warmer temperatures we are used to indoors in the winter. Not suitable for any drafty rooms. They prefer low light, and can also survive under florescent lights, so are a great option for a work desk or spaces that get minimal light. Their dark green leaves and white flowers will bring some much needed life to any dark space while also serving as a great air purifier. Like the rest on this list, they are far more tolerant of under watering than over watering. Not a Plant Person? If you’re for cleaner air, a calmer environment, and enjoying the beauty of nature all in the comfort of your indoor space – maybe indoor plants are your next winter hobby? If so, this list serves as a great guide for the newbie plant owner, busy person or natural green thumb. Worried about the upkeep and care of your plants, whether out of town or during your regular cleaning services? Contact us here at Goldstar and let us know.  We’ll be happy to tend to them when we visit.

Goldstar logo

One step ahead: caring for your floors

Goodbye, snow and slush. Hello, water and muck. Your floors never get a break, no matter the season. Whether you’ve got hardwood, ceramic or vinyl underfoot, follow these tips to keep your floors properly maintained year-round. (Too busy to clean your floors? Goldstar Cleaning can help with all your floor-care needs.) Stripping and waxing
Your floor puts up with a lot, from dirt to pet hair. Make sure to return the favour by cleaning your floor regularly.
Floors with a wax finish should have the wax stripped and then reapplied at least once a year to maintain their shine and protect the floor from damage. There are different kinds of wax strippers for hardwood, vinyl and masonry (ceramic or stone) flooring; check with your local cleaning supply store to find the right kind for you. (Note: wax strippers are toxic and give off fumes. Be sure to use wax stripper in a well-ventilated area, and wear rubber gloves when handling.) To strip wax, apply a layer of stripper to a small area of floor, then wipe the area with a scrubbing pad to remove the waxy buildup. Use a scrub brush or a toothbrush to remove wax from corners and hard-to-reach areas. Use a putty knife to remove large wax deposits. Once the old wax has been removed, it’s time to apply a new layer. Apply the wax sparingly directly on the floor, and spread it into a very thin coat using long, straight strokes with a wax applicator or sponge mop. Open windows, and let dry to a shine. Apply two or three thin layers of fresh wax, being sure to allow each coat to dry thoroughly before applying the next. Buff your floor between wax applications to remove scratches and keep the surface looking radiant. Vacuuming, mopping and sweeping Regular vacuuming or sweeping will remove surface dirt from your floor. It also makes mopping and waxing less arduous. In addition to vacuuming, you should wipe your floor with a rag mop once a week to clear away surface stains. For vinyl, laminate and masonry floors, try a mixture of one part water, one part alcohol, one part vinegar and a few drops of dish washing liquid. Fill a spray bottle with the mixture spray, the floor, and mop. The alcohol sanitizes and helps dry the floor quickly, while the vinegar and dish washing liquid cuts through the dirt and grease with ease. Daily care for your floor Floors can be divided into two varieties: those that you can get wet, and those that you can’t. A wax finish does not make your hardwood floor water-proof. Wipe spills with damp paper towels as soon as they hit the floor, and buff the area with a soft, dry cloth. Avoid dragging furniture across your floor, which can scratch the surface. Attach felt or nylon glides to the legs of heavy furniture items, and check the glides occasionally for dirt, which can also scratch. Use area rugs or mats in high traffic areas like vestibules.

Compu-clean: How to clean your PC

If you’re anything like me, your cleaning regiment is probably very structured: clean the tops of things. Clean underneath those same things. Repeat as necessary. But many homeowners neglect the most frequently-used items in their homes – their electronics, and in particular their computers. These ubiquitous (and expensive) devices can become clogged with dust and grime after years of continuous use, which can shorten their lifespan and expose you and your family to harmful bacteria (just think of how many people touch your keyboard in an average week.) Fortunately, cleaning your PC is as easy as 1-2-3. What you’ll need:
  • A Screwdriver
  • Can of compressed air (available from computer dealers or office-supply stores)
  • Cotton swabs (do not use a cotton ball)
  • Rubbing alcohol
  • Soft, lint-free cloths, paper towels, or anti-static cloths
  • Water
(Note: ALWAYS turn off electronic devices and unplug them before performing any cleaning or maintenance). Step 1: Cleaning your tower Computer towers require ventilation to avoid overheating. But the fan and vents also allow dust to get inside, which can make the ventilation systems less efficient. To clean inside your tower, you must first open the case. Computers vary in the kinds of fastening mechanisms that hold the tower together – some use knobs or slots that can be removed by hand, while others are held together by screws. If in doubt, consult your computer’s owner’s manual. (Note, it some cases opening your computer case will void the warranty. If in doubt, consult your computer’s owner’s manual.) Once the case is open, you’ll want to avoid touching the interior as much as possible. Remove large pieces of dust or lint with a cloth or a pair of tweezers. Angle the computer downward, then use the compressed air to remove dust from hard-to-reach corners. Use the compressed air to clean the tower vents, fan, disk drive and CD-ROM drive. Finally, close the case, and wipe down the exterior of the tower with a cotton swab and some rubbing alcohol. Step 2: Cleaning your monitor Take care when choosing what materials to use when cleaning your monitor. Do not use paper towels, which can scratch the monitor surface – use a soft, lint-free cloth instead. Also, never spray cleaning materials directly onto a monitor screen – spray onto the cloth. For LCD screens (used in flat screen and laptop monitors), wipe down the screen using a small amount of water on a soft, lint-free cloth. For glass screens (used in “TV-style” monitors), you can use glass cleaner, again with a soft, lint-free cloth. Step 3: Cleaning your Mouse and Keyboard Unplug the mouse and keyboard, if they’re connected to your computer, or turn them off, if they’re wireless. To clean your keyboard, first turn it upside down over a sink or waste basket and shake out any loose debris. Then, use compressed air to clean between the keys. Finally, use a cotton swab and rubbing alcohol to wipe off any stains. In some cases, you may need to remove “sticky” keys and clean them separately. To clean your mouse, use a cotton swab and rubbing alcohol to wipe off the top of the mouse. If your mouse uses an electronic sensor, rather than the traditional roller-ball, make sure to wipe off any dust or debris from the sensor. If your mouse has a roller ball, open the underside of the mouse and remove the roller ball. Soak the roller ball in water and let it air dry. Then, wipe the interior of the mouse with rubbing alcohol and a soft, lint-free cloth, then spray the interior with compressed air. Return the roller ball and to the mouse and close it.

6 Ways to Clean Up Your Act in 2013

Is 2013 the year you resolved to keep your house tidy? With planning, a bit of extra effort and these six tips to start you off, you can succeed where your 2012 diet failed. 1. Start with a clean slate. Get a leg up on your new cleaning regiment by bringing in professionals to tackle major jobs, like cleaning the stove or scrubbing floors. Once your home is spic and span, make it your resolution to keep it that way. 2. Make a cleaning plan. The best resolutions have clear, concise goals and a timeline to accomplish them. Check out the 2013 New Year’s Cleaning Grand Plan Challenge, a 14-week program by the Organized Home web blog, for a step-by-step schedule, as well as cleaning tips and tricks. 3. Invest in tools to make cleaning easier. Often, it’s the simple things that help keep a space clean: a cover for the microwave, baking soda for the fridge, automatic cleaners for toilet and shower. And let’s not forget that industrious robotic helper, the Roomba. It cleans your floors while you’re away, then recharges itself automatically. 4. Clear that clutter. The post-Christmas season is a good time to take stock of your living space. Has paperwork taken over your desk? File it away. Ages-old condiments in the fridge? Toss ’em. Invest in storage containers to put away odds and ends. 5. Tackle cleaning one chore at a time. With any New Year’s resolution, the quickest route to failure is to tackle too much at once. Resolve to set aside just fifteen minutes per day to clean your home, focusing on one room at a time. 6. Reward yourself for a job well done. Resolve to treat yourself whenever you reach a milestone on your cleaning plan. A new flat-screen TV would look great mounted of the wall of your squeaky clean living room.

The 10-Minute Holiday Cleanup

‘Twas the night before Christmas, and all through the house, not a creature was stirring, not even a… dust bunny? With all the hustle and bustle of the holidays, keeping your space ready for Santa’s annual inspection can seem like a tall order. But not every cleaning job requires hours of work. This solid ten-minute cleanup will ensure your home is ready to entertain over the holidays. First, grab a laundry basket and gather up your clutter. This includes anything you don’t want guests to see. (We’re looking at you, Elf on the Shelf.) Focus on clearing out common areas, like the front entrance, kitchen, living and dining room and bathrooms. Throw in anything and everything that doesn’t belong, toss it in a closet and sort through it later. Next, wipe down surfaces, focusing on the bathroom and kitchen. Use quick disinfectant wipes to leave surfaces shiny and clean. If you’re pressed for time, don’t worry about moving things around. If you’re really pressed for time, cover the surfaces with holiday-themed decorations. (We’re looking at you, Elf on the Shelf.) Give the bathroom a once-over. Nothing fancy: pour some Pinesol into the toilet bowl, wipe down the mirrors, clean the sink and lay out fresh towels. Polish it off with some candy cane-scented pot pourri to give your WC a festive touch. Sweep, sweep, sweep. You want your floors to pass the “step test”: Can you walk across the floor in your stocking feet without picking anything up in them? Good enough. Finally, vacuum your carpets. Don’t concern yourself with the nooks and crannies; the key is to make those comforting “vacuuming lines” on the carpet, to show guests that you care about cleanliness – or at least pretend to.

Event Highlight: 2012 Fernie Ski Swap

                      Is your old skiing equipment gathering dust in your closet? Consider recycling your old gear to make some extra cash — and support young alpine skiers — at the 2012 Fernie Ski Swap. On Friday, November 9 from 6 p.m. to 8 p.m., participants can drop off their gently-used skis, snowboards and accessories at the Fernie Community Centre (901 6 Ave.) The gear will be on sale Saturday, November 10 from 10 a.m. to 2 p.m., so bring the family and shop for once-a-season deals on quality second-hand skiing and snowboarding equipment. Admission to the Ski Swap is $2 per person, $5 per family. All proceeds benefit the Fernie Alpine Ski Team (FAST) Juvenile Racers. Commission and handling fees apply. For more information, visit skifernie.com.

Six Ways to Prepare Your Home for Winter

 
Caulk your window frames inside and out and weatherstrip around doors to prevent leaks. (istockphoto.com)
  If you thought last year’s mild winter was the new norm, think again. While Canada posted the third warmest winter on record in 2011-2012, meteorologists with AccuWeather are predicting a healthy dose of snow and cold across the nation this season. Alberta and British Columbia, in particular, are expected to experience colder and drier conditions than usual. But homeowners need not fear; by winterizing areas in and around the house, you can easily keep Jack Frost’s icy grip at bay. Gold Star Cleaning offers these six tips to get your started. 1. The Furnace and fireplace Preparing your home’s heating system for winter won’t just save you money on your heating bills – it could also save your life. A build-up of dust or debris over the summer months can turn your furnace or fireplace into a potential fire hazard, so it’s important to make sure they’re functioning properly. Here’s a quick to-do checklist: -Have your furnace inspected annually by a qualified HVAC technician. Have your ducts cleaned every three years. -Clean or replace your furnace’s air filter. -Clean your vents, and ensure that vents are not obstructed by furniture or debris. -Have your chimney cleaned, and cap the top of your chimney. -Remove any flammable objects from around your furnace and fireplace. Star tip: remove glass from gas fireplaces with a screwdriver, lay flat on a drop sheet and wipe away stubborn mineral deposits using a gas fireplace glass cleaner. 2. Smoke and carbon monoxide detectors While we’re on the topic of fire safety, now is a good time to ensure you have a working fire detector in your home, as required by law (the Office of the Fire Commissioner of British Columbia has a break-down of the new requirements for smoke detectors in private dwellings, which have been in place since 2010). If your smoke detector is battery-powered, replace the batteries in your smoke detector and test it. Replace smoke detectors every ten years. If you haven’t yet installed a lifesaving carbon monoxide detector in your home, get one. 3. Doors and windows Keep the warm air in your home by identifying and sealing leaks. An easy way to find leaks is by holding a candle near the edges of a window or door frame; if the flame flickers or goes out, you have a leak. Caulk your window frames inside and out and weatherstrip around doors. Remove your summer screens and install storm windows (or use good ol’ fashioned shrink wrap). 4. Roof, gutters and downspouts Take it from me – you don’t want to be climbing on your roof in the dead of winter to fix a leak. Take the time now to replace any damaged roof shingles or tiles, clear out of your gutters and install leaf guards. If necessary, add piping to your downspout so that it transports water at least 10 feet away from your home. If your home has an attic, add additional insulation to keep warm air from escaping and forming condensation or ice dams in your home. 5. Pipes and Plumbing A burst pipe  can cause untold damage to your home. Avoid this potential catastrophe by targeting pipes where water is likely to freeze. Turn off the water to your hose bibs via the shutoff valve inside your home. Look for exposed pipes in your house – likely locations include crawlspaces, basements or garages – and wrap them with foam rubber sleeves or fibreglass insulation. If you’re going away for the holidays, keep the temperature in your home above 50 degrees Fahrenheit (10 degrees Celsius) to reduce the risk of freezing. Star tip: Check that sump pumps are working and ready for the spring thaw.  If you do have flooding problems later on  a cleaning company that does restoration cleaning is a number you will want to have on hand. 6. The Great Outdoors Spring may seem like a distant memory, but that’s no reason to neglect your yard. Trim any tree branches hanging close to your house or near electrical wires. Protect garden tools and outdoor appliances by cleaning and storing them. Drain your garden hose. Remove the gas from your lawnmower – and while you’re at it, fill up the tank in your snowblower and test it. Finally, make sure you’re prepared for the inevitable snowfall with a sturdy shovel and bags of sand or salt. Star tip: Insist that people remove their shoes at the door and keep a rubber boot tray at each one to prevent the outdoors coming indoors.