Shop

How to Keep That Hockey Bag and Gear Fresh


largehockeyword

There it is again. Sitting, lifeless. Dropped off again right beside the washing machine. Its been there for three whole days. Left to fester, left to seep, left to marinade. The dreaded hockey bag, consequently full of sweaty equipment you’d rather forget about. It belongs to your roommate, your kids, your significant other, but honestly, it doesn’t matter who’s it is, you just want it to stop wafting through the entire house. So let Goldstar guide you. Here are four helpful hints to keep that hockey bag winners circle fresh.    

1.Air it out; don’t let the wet gear sit.

First of all, don’t let it sit! The worst thing you can do is let the wet sweaty equipment sit. An indoor clothing rack will become your best friend. They’re easy to find and you can purchase at your local housewares stores. Somewhere like Fernie Home Building Center is sure to have what you need. Add a heater, a fan, or a dehumidifier to help speed up the process. On those bluebird days, lay it out on the deck. The cold temperatures will surely kill any smelly bacteria that may be lingering.  

2.Wash what you can, regularly.

Aside from airing it out, it’s important to wash our hockey equipment to keep it fresh. A lot of hockey hockey equipment equipment is safe to add right to the washing machine! Both front or top loading machines will do the trick. (make sure you leave enough room for equipment to move once it’s in the machine. A washing machine overfilled will lead to tears in equipment.) 
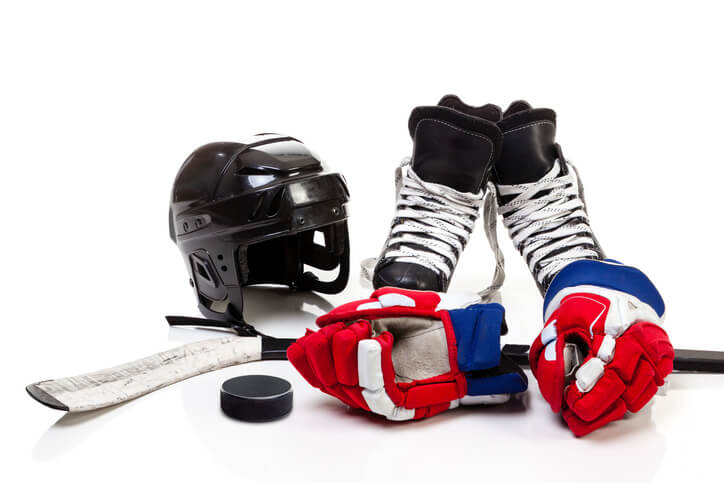
Here is a list of the hockey equipment you CAN and CANNOT wash in the machine.   WASHING MACHINE FRIENDLY
  • Socks, Jerseys, and base layers.
  • Jock (don’t forget to remove the cup as it cannot be washed in the machine. Fasten the Velcro so it doesn’t attach to anything else in the wash.)
  • Shin Pads*
  • Hockey Pants*
  • Elbow Pads*
  • Shoulder Pads* and
  • Gloves*
DO NOT use bleach; white vinegar CAN BE added to the wash is a great alternative, as it will kill odor-causing bacteria.
DO NOT put equipment in the dryer. Allow it to air-dry.
  NOT WASHING MACHINE FRIENDLY
  • Goalie Pads
  • Goalie Mitts
  • Skates
  • Helmet
If you’re not sure about any items, you can drop anything off at our dry cleaning depot and we’ll take care of that for you.  

3.Don’t forget the inside of the helmet.

In addition to our body equipment, an important piece of equipment that we never forget to play without, but sometimes we sometimes forget to wash, the helmet. To effectively clean the inside of your helmet you will need to follow these simple steps.
  1. Mix a bowl with hot water and no tears kids shampoo.
  2. Dip the sponge in water/shampoo mix, ring well, and scrub inside of the helmet.
  3. Repeat process with only water and dry out.
(With sweat commonly built up in the helmet, it is especially important that you use no tears shampoo. If there is any chance that soap hasn’t been properly rinsed out and drips into your eyes while playing, this will save you from a tearful accident.)  

4.LAST BUT NOT LEAST, Those smelly skates!

Finally, our most dreaded piece of equipment… the hockey skates. Though they may seem like the most daunting task, they are actually the easiest piece to clean. All you have to do is sprinkle some baking soda in those stinky blades, let them sit overnight and dump it out in the morning! You’ll be amazed by how effective this simple trick is.

Closing your summer vacation home

Wintery Cabin ReflectionBetween Labor Day and Thanksgiving, owners of second homes perform the annual ritual of closing up their un-winterized rural cottages, beach retreats and mountain cabins. If you plan on vacating a seasonal property for any extended period of time, there are a few basic things you can do to help safeguard your house through the cold months ahead. Outside the home -Check the foundation, siding and trim for cracks and crevices that could admit moisture or provide an entry point for unwelcome creatures. -Examine where the roof overhang meets the house. Pests as teeny as wasps and as large as squirrels often seek to nest in the solar-warmed space of house attics. -Clear the gutters so that rain and snowmelt run freely away from the base of the house, and using a ladder or binoculars, inspect the roof for raised shingles, making repairs if necessary. -Store outdoor furniture. Place tables, chairs, hammocks, delicate garden ornamentation, and other outdoor accessories in a garage, shed or storage unit. -Trim back any tree branches near the house that could cause damage in a strong storm. Power, gas and plumbing -Shut off electricity at the main. Leave on circuits that control such essentials as the alarm system. Also be sure to unplug appliances, especially the large and expensive ones, just in case lightning strikes. -Gas can be turned off at the main, but for many, it’s easier to call the utility and temporarily suspend service. -Drain all water pipes. Accomplish this by turning off the main water supply, opening all faucets and leaving them open. Remember to drain the supply hoses to indoor outlets like the dishwasher and outdoor outlets like the sprinkler system. -Prevent water in a toilet’s trap from evaporating (and thereby permitting sewer gases to enter the home) by raising the toilet’s lid and seat and covering the bowl with saran wrap. Kitchen, living and dining room -Clean out closets and cabinets, leaving them open to ventilate. -Clean out the refrigerator and freezer. Don’t keep anything that is likely to go bad during the time you are away. -Remove and store all bedding in plastic (throw in moth balls if you have them) and for protection against burrowing mice, cover all mattresses. -Store non-perishable food in metal containers and relocate cans to the basement if possible, or take them back to your primary residence. Security and service -Cancel your mail service. Ask a neighbour to watch out for any special deliveries that might arrive on your doorstep while you’re away. -Lock your house at all entry points and close the shutters. -Have someone make regular check-ins. Leave your caretaker with a key for emergency entry if something should go wrong. -Make it look like someone is home. Buy a couple of light timers and set them up to turn on automatically in the evenings. Do not leave valuables in a vacation home that may attract thieves. At the very least, move them out of the line of sight from windows.

Spruce up Your Spruce: Caring for your Christmas tree

A natural Christmas tree has a way of conjuring up memories of holidays past; the pungent smell of fresh pine needles, the sight of twinkling lights wrapped around the branches – not to mention all the colourful gifts waiting to be opened underneath – are all powerful reminders of the spirit of the holidays. Without proper care however, your majestic Christmas tree can quickly become a Charlie Brown-style twig or even a fire hazard. By following these six steps, you can avoid a cleaning headache on Boxing Day. 1. Choose your tree wisely. Not all Christmas trees are created equal. Fir trees, like the Douglas or Balsam Fir, and pine trees like the Scotch or White Pine hold their needles long after being cut down. Other varieties, like the Nordic or White Spruce, have poor needle retention and should only be bought and used as “living” Christmas trees (with the roots still attached). 2. Pick a healthy specimen. As a general rule of thumb, fresh-cut Christmas trees will last longer than pre-cut ones. Watch out for trees that have a large number of browning needles, or ones whose needles are rigid or fall off when brushed – they’re well on their way to becoming kindling. 3. Keep your tree hydrated. After bringing your tree home, cut about an inch off the trunk to allow water to flow into the stump. Keep your tree outside in a bucket of water for a few hours before mounting it indoors. You should purchase a Christmas tree stand that allows you to water your tree, and change the water at least once a day. 4. Cover your floor. Protect your floor from pine needle, debris and sap by choosing a tree skirt that is at least as wide as the tree, if not longer. For easy cleanup, place a plastic tarp on the ground under your tree skirt. When you’re ready to take your tree out to the curb, simply roll up the tarp and toss any fallen needles into the trash. 5. Remove any fire hazards. Keep your tree well away from fireplaces, space heaters, candles or other sources of heat; they’ll not only dry the tree out, they can also cause it to ignite. Check the cords of Christmas lights for exposed wiring and replace any bulbs that aren’t working. 6. Decorate with care. After mounting your tree, give it a day before decorating, to allow the branches to settle into their natural position. Add the heaviest decorations, like the lights, first, wraping them closest to the tree. Follow them up with draping decorations like tinsel, then the ornaments, and finally the star!

The 10-Minute Holiday Cleanup

‘Twas the night before Christmas, and all through the house, not a creature was stirring, not even a… dust bunny? With all the hustle and bustle of the holidays, keeping your space ready for Santa’s annual inspection can seem like a tall order. But not every cleaning job requires hours of work. This solid ten-minute cleanup will ensure your home is ready to entertain over the holidays. First, grab a laundry basket and gather up your clutter. This includes anything you don’t want guests to see. (We’re looking at you, Elf on the Shelf.) Focus on clearing out common areas, like the front entrance, kitchen, living and dining room and bathrooms. Throw in anything and everything that doesn’t belong, toss it in a closet and sort through it later. Next, wipe down surfaces, focusing on the bathroom and kitchen. Use quick disinfectant wipes to leave surfaces shiny and clean. If you’re pressed for time, don’t worry about moving things around. If you’re really pressed for time, cover the surfaces with holiday-themed decorations. (We’re looking at you, Elf on the Shelf.) Give the bathroom a once-over. Nothing fancy: pour some Pinesol into the toilet bowl, wipe down the mirrors, clean the sink and lay out fresh towels. Polish it off with some candy cane-scented pot pourri to give your WC a festive touch. Sweep, sweep, sweep. You want your floors to pass the “step test”: Can you walk across the floor in your stocking feet without picking anything up in them? Good enough. Finally, vacuum your carpets. Don’t concern yourself with the nooks and crannies; the key is to make those comforting “vacuuming lines” on the carpet, to show guests that you care about cleanliness – or at least pretend to.

Event Highlight: 2012 Fernie Ski Swap

                      Is your old skiing equipment gathering dust in your closet? Consider recycling your old gear to make some extra cash — and support young alpine skiers — at the 2012 Fernie Ski Swap. On Friday, November 9 from 6 p.m. to 8 p.m., participants can drop off their gently-used skis, snowboards and accessories at the Fernie Community Centre (901 6 Ave.) The gear will be on sale Saturday, November 10 from 10 a.m. to 2 p.m., so bring the family and shop for once-a-season deals on quality second-hand skiing and snowboarding equipment. Admission to the Ski Swap is $2 per person, $5 per family. All proceeds benefit the Fernie Alpine Ski Team (FAST) Juvenile Racers. Commission and handling fees apply. For more information, visit skifernie.com.

8 Ways to Prepare your Vacation Rental Home for Guests

Winter in East Kootenay can mean only one thing: tourism. And many of those out-of-town visitors will be renting guest homes to make the most of the skiing and snowboarding the region has to offer. If you’ve decided to take the plunge and take on renters in your guest home this season, here are eight tips to ensure you and your guests are a happy as possible. 1. Prepare a “Master List” for Your Guest Whether your guests are from out of town or from out of the country, chances are they’ll need some time to become accustomed to their new surroundings. You can help them out by preparing a list of important information, like the physical address of the guest house, garbage and recycling pick-up days, emergency contact information and security passwords. For a personal touch, include directions to the local grocery store, hardware store, hair salon and your favourite restaurants and bars. Include any information about rules. Is there a part of the house that’s off-limits? Do the neighbours have a habit of calling in a noise complaint if there’s partying past 11? Now is the time to let your guests know. 2. Prepare a “Master List” for Yourself Keeping an inventory is not a sign that you find your guests untrustworthy. Rather, it’s a way to avoid disputes over items that may have been lost, damaged (or yes, stolen) while you’ve been away. Putting together a checklist also ensures that your guests have everything they need to enjoy their stay. Perform a quick inspection of major appliances and furniture in the house and note their condition. If there are valuables in the house, like artwork, make a note of them; anything that’s truly irreplaceable should be taken with you or locked up. Consider taking pictures of the rooms in your house before your guests arrive. 3. Stock your kitchen — but keep it simple People rarely expect to eat off fine china — especially while they’re on vacation. So feel free to stock your kitchen with lots of inexpensive dinnerware, including all the necessary cooking and baking tools. When it comes to dishes, white is ideal. Unbreakable is even better. (Don’t forget to stock some wine glasses and a decent corkscrew.) 4. Help your guests prepare for their guests Unless you explicitly say otherwise, you should expect that your guest house will be hosting a large group function at some point in the season. Lots of chairs and/or patio furniture, a large table, extra bed linens and an inflatable mattress will help your guests roll out the welcome mat for visitors. 5. Keep bedrooms clean, bright and white Sleeping in an unfamiliar setting can be a bit uncomfortable at first. You can help your guests adjust by keeping the tone of your guest bedrooms as neutral as possible — no crazy colour schemes or knickknacks on the night table. Simple white bed linens look clean and can be bleached to maintain their radiance. 6. Help your guests keep the space clean Let’s face it — messes happen. But if you give your guests the tools they need to clean up after themselves, it’s less likely the damage will be permanent. Stock cleaning supplies like paper towels, all-purpose cleaning spray, air freshener, a vacuum cleaner, mop, dust pan and broom. Put slip covers on your sofas and mattress covers on your bed. Leave plenty of space in closets and cupboards for guests to store their things. 7. Buy a housewarming gift It doesn’t need to be anything fancy; a basket of festive goodies or a bottle of wine goes a long way toward making your guests feel welcome in their home-away-from-home. 8. Think of the little things Throw in some board games, movies, toys and sporting equipment to help keep your guests entertained. If your guest house has a BBQ, fill up the propane tank and clean the grill.

Six Ways to Prepare Your Home for Winter

 
Caulk your window frames inside and out and weatherstrip around doors to prevent leaks. (istockphoto.com)
  If you thought last year’s mild winter was the new norm, think again. While Canada posted the third warmest winter on record in 2011-2012, meteorologists with AccuWeather are predicting a healthy dose of snow and cold across the nation this season. Alberta and British Columbia, in particular, are expected to experience colder and drier conditions than usual. But homeowners need not fear; by winterizing areas in and around the house, you can easily keep Jack Frost’s icy grip at bay. Gold Star Cleaning offers these six tips to get your started. 1. The Furnace and fireplace Preparing your home’s heating system for winter won’t just save you money on your heating bills – it could also save your life. A build-up of dust or debris over the summer months can turn your furnace or fireplace into a potential fire hazard, so it’s important to make sure they’re functioning properly. Here’s a quick to-do checklist: -Have your furnace inspected annually by a qualified HVAC technician. Have your ducts cleaned every three years. -Clean or replace your furnace’s air filter. -Clean your vents, and ensure that vents are not obstructed by furniture or debris. -Have your chimney cleaned, and cap the top of your chimney. -Remove any flammable objects from around your furnace and fireplace. Star tip: remove glass from gas fireplaces with a screwdriver, lay flat on a drop sheet and wipe away stubborn mineral deposits using a gas fireplace glass cleaner. 2. Smoke and carbon monoxide detectors While we’re on the topic of fire safety, now is a good time to ensure you have a working fire detector in your home, as required by law (the Office of the Fire Commissioner of British Columbia has a break-down of the new requirements for smoke detectors in private dwellings, which have been in place since 2010). If your smoke detector is battery-powered, replace the batteries in your smoke detector and test it. Replace smoke detectors every ten years. If you haven’t yet installed a lifesaving carbon monoxide detector in your home, get one. 3. Doors and windows Keep the warm air in your home by identifying and sealing leaks. An easy way to find leaks is by holding a candle near the edges of a window or door frame; if the flame flickers or goes out, you have a leak. Caulk your window frames inside and out and weatherstrip around doors. Remove your summer screens and install storm windows (or use good ol’ fashioned shrink wrap). 4. Roof, gutters and downspouts Take it from me – you don’t want to be climbing on your roof in the dead of winter to fix a leak. Take the time now to replace any damaged roof shingles or tiles, clear out of your gutters and install leaf guards. If necessary, add piping to your downspout so that it transports water at least 10 feet away from your home. If your home has an attic, add additional insulation to keep warm air from escaping and forming condensation or ice dams in your home. 5. Pipes and Plumbing A burst pipe  can cause untold damage to your home. Avoid this potential catastrophe by targeting pipes where water is likely to freeze. Turn off the water to your hose bibs via the shutoff valve inside your home. Look for exposed pipes in your house – likely locations include crawlspaces, basements or garages – and wrap them with foam rubber sleeves or fibreglass insulation. If you’re going away for the holidays, keep the temperature in your home above 50 degrees Fahrenheit (10 degrees Celsius) to reduce the risk of freezing. Star tip: Check that sump pumps are working and ready for the spring thaw.  If you do have flooding problems later on  a cleaning company that does restoration cleaning is a number you will want to have on hand. 6. The Great Outdoors Spring may seem like a distant memory, but that’s no reason to neglect your yard. Trim any tree branches hanging close to your house or near electrical wires. Protect garden tools and outdoor appliances by cleaning and storing them. Drain your garden hose. Remove the gas from your lawnmower – and while you’re at it, fill up the tank in your snowblower and test it. Finally, make sure you’re prepared for the inevitable snowfall with a sturdy shovel and bags of sand or salt. Star tip: Insist that people remove their shoes at the door and keep a rubber boot tray at each one to prevent the outdoors coming indoors.