Shop

How Vinegar Can Improve Your Laundry Pile

Vinegar and Your Laundry Pile

We are sure you have heard the saying you will “go a lot further with sugar, than with vinegar”. Normally we would agree, but for the lifecycle of your clothes and your laundry game, the opposite is true. Here’s a little reminder of how distilled white vinegar is every household’s little laundry helper.

woman doing laundry

It Removes Stains

Commercial stain removers are effective at their job, but vinegar is tried and tested for removing stubborn and common stains, such as; blood, grass, ink, mildew, crayons, vomit, coffee & tea, tomato, mustard and rust. Vinegar can come to the rescue in all of these “stain situations” due to the acetic acid in it, that is both mild and effective in dissolving residues, giving a second act to your wardrobe. Soak the stains in equal part vinegar and water for about 15 minutes (longer for grass stains) before rinsing it with cool water. For tough stains, rub salt on the stain as well to help break down the residue (especially good for crayons). Make sure the stain is out after removing it from the wash before you dry the article of clothing.

It Can Help Keep Your Dark Clothing Stay Dark

Did you know that adding half a cup of distilled white vinegar to the final rinse in your cycle can help your favourite dark skinny jeans stay dark? The vinegar helps to remove residual soap and detergent that is responsible for dulling dark articles over time. Which is also the culprit behind dulling your whites. Which explains why it has the ability to…

It Also brighten your Whites

The secret in white vinegar is that the acetic acid in it is mild to all fabrics.

It Gets Rid of Odours

You have probably made “that face” when doing laundry and noticing that certain odours have started to make a home on your clothing, even after being in the wash. For athletic gear and their sweaty odour, fill a spray bottle with undiluted white vinegar. Spray the areas of concern and let the vinegar soak for a few minutes before placing it in the wash. To get rid of the yellowing that can occur with sweat stains, cover the stain in vinegar and rub salt into it. Best to use a coarser salt, but if regular table salt is all you have handy – just add extra elbow grease. Then air dry the garment before putting it in the wash. For smoke odours, add half a cup of vinegar to a hot wash cycle.
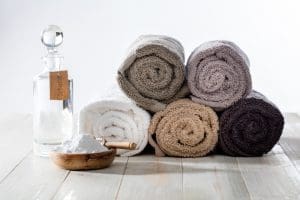
vinegar for laundry

It Acts as a Natural Fabric Softener

Distilled white vinegar is a great alternative to commercial fabric softeners. It is both hypoallergenic and safe and can carry less of a heavy scent compared to branded softeners. To use, add one cup to your final rinse cycle.

It Cleans Your Laundry Tools

Over time your washing machine can gather a build up of soap residue and mineral deposits. This can restrict its cleaning performance by blocking the flow of water. It is recommended a few times a year to run a complete wash cycle with the machine empty using hot water and a cup of vinegar. The same build-up can happen with your trusty Iron, causing blockages in its spray nozzle and steam vents. This is remedied by filling its water chamber with an equal measure of water and vinegar. Placing the iron in a safe heatproof place and in an upright position you can let it steam for a few minutes. After the iron has cooled off, rinse out the chamber with water. Fill it with water again and give it a good shake to allow the water to seep through the water vents. Vinegar can also be used to clean any scorch marks on the faceplate of your Iron. First, make a paste of vinegar and salt and rub onto the faceplate of the Iron when it is cool and turned off. Wipe off the paste with a cloth that has been sprayed with vinegar and then once again with a cloth that has been dampened with only water.

*Not only is distilled white vinegar a great option to add to your laundry routine it is also the environmentally friendly option too. Make sure when selecting a vinegar that you chose a distilled white vinegar to avoid any tannins or dyes.

After all that laundry, contact our cleaning professionals to help keep your space clean so you can do more of what you love to do.

Contact Goldstar Cleaning Services Group today at +1 250 423 4029

Goldstar logo

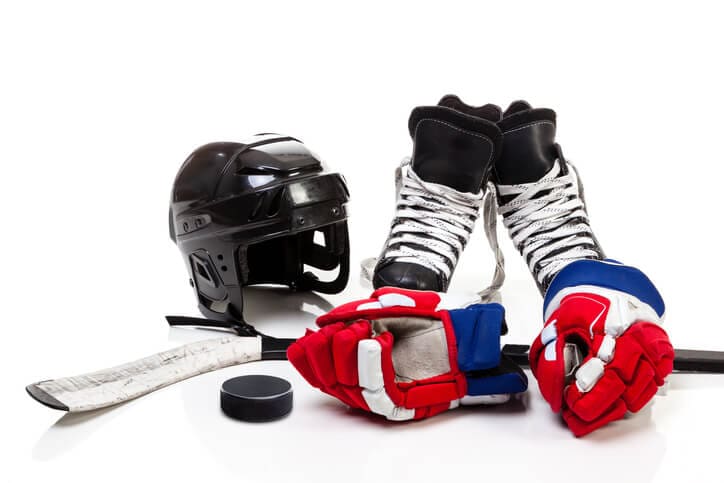
How to Keep That Hockey Bag and Gear Fresh


largehockeyword

There it is again. Sitting, lifeless. Dropped off again right beside the washing machine. Its been there for three whole days. Left to fester, left to seep, left to marinade. The dreaded hockey bag, consequently full of sweaty equipment you’d rather forget about. It belongs to your roommate, your kids, your significant other, but honestly, it doesn’t matter who’s it is, you just want it to stop wafting through the entire house. So let Goldstar guide you. Here are four helpful hints to keep that hockey bag winners circle fresh.    

1.Air it out; don’t let the wet gear sit.

First of all, don’t let it sit! The worst thing you can do is let the wet sweaty equipment sit. An indoor clothing rack will become your best friend. They’re easy to find and you can purchase at your local housewares stores. Somewhere like Fernie Home Building Center is sure to have what you need. Add a heater, a fan, or a dehumidifier to help speed up the process. On those bluebird days, lay it out on the deck. The cold temperatures will surely kill any smelly bacteria that may be lingering.  

2.Wash what you can, regularly.

Aside from airing it out, it’s important to wash our hockey equipment to keep it fresh. A lot of hockey hockey equipment equipment is safe to add right to the washing machine! Both front or top loading machines will do the trick. (make sure you leave enough room for equipment to move once it’s in the machine. A washing machine overfilled will lead to tears in equipment.) Here is a list of the hockey equipment you CAN and CANNOT wash in the machine.   WASHING MACHINE FRIENDLY
  • Socks, Jerseys, and base layers.
  • Jock (don’t forget to remove the cup as it cannot be washed in the machine. Fasten the Velcro so it doesn’t attach to anything else in the wash.)
  • Shin Pads*
  • Hockey Pants*
  • Elbow Pads*
  • Shoulder Pads* and
  • Gloves*
DO NOT use bleach; white vinegar CAN BE added to the wash is a great alternative, as it will kill odor-causing bacteria.
DO NOT put equipment in the dryer. Allow it to air-dry.
  NOT WASHING MACHINE FRIENDLY
  • Goalie Pads
  • Goalie Mitts
  • Skates
  • Helmet
If you’re not sure about any items, you can drop anything off at our dry cleaning depot and we’ll take care of that for you.  

3.Don’t forget the inside of the helmet.

In addition to our body equipment, an important piece of equipment that we never forget to play without, but sometimes we sometimes forget to wash, the helmet. To effectively clean the inside of your helmet you will need to follow these simple steps.
  1. Mix a bowl with hot water and no tears kids shampoo.
  2. Dip the sponge in water/shampoo mix, ring well, and scrub inside of the helmet.
  3. Repeat process with only water and dry out.
(With sweat commonly built up in the helmet, it is especially important that you use no tears shampoo. If there is any chance that soap hasn’t been properly rinsed out and drips into your eyes while playing, this will save you from a tearful accident.)  

4.LAST BUT NOT LEAST, Those smelly skates!

Finally, our most dreaded piece of equipment… the hockey skates. Though they may seem like the most daunting task, they are actually the easiest piece to clean. All you have to do is sprinkle some baking soda in those stinky blades, let them sit overnight and dump it out in the morning! You’ll be amazed by how effective this simple trick is.

How to tackle grass stains on clothing

You can be sure these clothes are going to have grass stains on them by the end of the day (istockphoto.com)
You can be certain this kid’s outfit is going to have grass stains on it by the end of the day. (istockphoto.com)
 

If you enjoy spending time outdoors in the summer, you know that nature inevitably leaves its mark on your clothes in the form of unsightly, hard-to-clean grass stains.

You can blame chlorophyll, the chemical that gives plants their green hue, for ruining your favourite pair of jeans. In addition to being a strong dye, chlorophyll binds well with natural fibres, making it notoriously difficult to remove.

While delicate materials like silk or wool should always be handled by a professional dry cleaner, denim and cotton clothes can benefit from grass cleaning solutions you can make at home. The basic steps are similar in each case:

Note: Some cleaners can fade or discolour clothing. Always “spot test” cleaners on an inconspicuous location before applying it to the stain.

Step 1: Give the stain a hot water bath. Run the stain under hot water, preferably using a high-pressure nozzle. This will remove any solid grass pieces and loosen the stain. For best results, you should clean the stain as soon as possible to keep it from setting.

Step 2: Scrub the stain with detergent. Any liquid detergent will do. Use a scrub brush or a toothbrush and thoroughly scrub the affected area, then rinse.

Step 3. Apply a cleaning agent. There are literally dozens of products that claim to remove grass stains, but the simplest and most cost-effective home remedy is a mixture of baking soda and white vinegar. Sprinkle baking soda on the stain, then pour the vinegar over top and scrub the mixture while it fizzes.

Step 4: Launder in warm or hot water. Most denim clothing can handle your washer’s hot water cycle, while cotton clothes can be washed in warm water. Just in case, you should always follow the washing instructions on the label. Wash with detergent as normal.

If the stain persists after step 4, don’t put the clothing in the dryer – this will cause the stain  to set. Instead, repeat steps 3 and 4 using “harsher” cleaners, starting with rubbing alcohol and then progressing to chlorine bleach. You can also try natural digestive enzymes, which are available at most health food stores. Mix the contents of several enzyme capsules in lukewarm water until you get a mixture with the consistency of toothpaste. Scrub the mixture into the stain and let it sit for 20 minutes, then repeat step 4.