Shop

How Vinegar Can Improve Your Laundry Pile

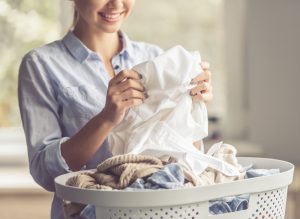
Vinegar and Your Laundry Pile

We are sure you have heard the saying you will “go a lot further with sugar, than with vinegar”. Normally we would agree, but for the lifecycle of your clothes and your laundry game, the opposite is true. Here’s a little reminder of how distilled white vinegar is every household’s little laundry helper.

woman doing laundry

It Removes Stains

Commercial stain removers are effective at their job, but vinegar is tried and tested for removing stubborn and common stains, such as; blood, grass, ink, mildew, crayons, vomit, coffee & tea, tomato, mustard and rust. Vinegar can come to the rescue in all of these “stain situations” due to the acetic acid in it, that is both mild and effective in dissolving residues, giving a second act to your wardrobe. Soak the stains in equal part vinegar and water for about 15 minutes (longer for grass stains) before rinsing it with cool water. For tough stains, rub salt on the stain as well to help break down the residue (especially good for crayons). Make sure the stain is out after removing it from the wash before you dry the article of clothing.

It Can Help Keep Your Dark Clothing Stay Dark

Did you know that adding half a cup of distilled white vinegar to the final rinse in your cycle can help your favourite dark skinny jeans stay dark? The vinegar helps to remove residual soap and detergent that is responsible for dulling dark articles over time. Which is also the culprit behind dulling your whites. Which explains why it has the ability to…

It Also brighten your Whites

The secret in white vinegar is that the acetic acid in it is mild to all fabrics.

It Gets Rid of Odours

You have probably made “that face” when doing laundry and noticing that certain odours have started to make a home on your clothing, even after being in the wash. For athletic gear and their sweaty odour, fill a spray bottle with undiluted white vinegar. Spray the areas of concern and let the vinegar soak for a few minutes before placing it in the wash. To get rid of the yellowing that can occur with sweat stains, cover the stain in vinegar and rub salt into it. Best to use a coarser salt, but if regular table salt is all you have handy – just add extra elbow grease. Then air dry the garment before putting it in the wash. For smoke odours, add half a cup of vinegar to a hot wash cycle.

vinegar for laundry

It Acts as a Natural Fabric Softener

Distilled white vinegar is a great alternative to commercial fabric softeners. It is both hypoallergenic and safe and can carry less of a heavy scent compared to branded softeners. To use, add one cup to your final rinse cycle.

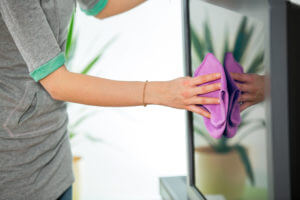
It Cleans Your Laundry Tools

Over time your washing machine can gather a build up of soap residue and mineral deposits. This can restrict its cleaning performance by blocking the flow of water. It is recommended a few times a year to run a complete wash cycle with the machine empty using hot water and a cup of vinegar. The same build-up can happen with your trusty Iron, causing blockages in its spray nozzle and steam vents. This is remedied by filling its water chamber with an equal measure of water and vinegar. Placing the iron in a safe heatproof place and in an upright position you can let it steam for a few minutes. After the iron has cooled off, rinse out the chamber with water. Fill it with water again and give it a good shake to allow the water to seep through the water vents. Vinegar can also be used to clean any scorch marks on the faceplate of your Iron. First, make a paste of vinegar and salt and rub onto the faceplate of the Iron when it is cool and turned off. Wipe off the paste with a cloth that has been sprayed with vinegar and then once again with a cloth that has been dampened with only water.

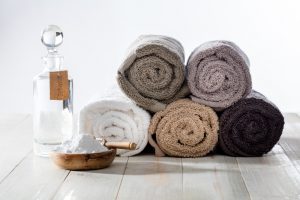
*Not only is distilled white vinegar a great option to add to your laundry routine it is also the environmentally friendly option too. Make sure when selecting a vinegar that you chose a distilled white vinegar to avoid any tannins or dyes.

After all that laundry, contact our cleaning professionals to help keep your space clean so you can do more of what you love to do.

Contact Goldstar Cleaning Services Group today at +1 250 423 4029

Goldstar logo

Spring Cleaning Tips for The Office

5 Quick Tips to Tidy Up the Office

Tip 1: Get your paperwork organized

The concept of having a paperless office sounds very appealing. However, turning that into a reality can take some time. It requires that all of your business processes be digitized and for you to eliminate using paper in your entire facility. A solution that is more feasible is to find ways to ensure that all of your paperwork stays regulated and organized. One way to do that is to create space on a bookshelf or cabinet for the amount of paperwork that you need to store.

The next step that you need to do is divide up you are papers into various categories, like having a set that is labeled “to be filed” while another one is for your “to do” paperwork. After the various groups have been categorized, the documents should be stored in the appropriate file boxes or paper trays.

Tip 2: Set aside an area for your supplies

It’s common for office supplies and stationery to be found on practically every desk in many offices. At the same time, those types of supplies are not normally used on a daily or regular basis. Those items over time make desks look very messy and untidy. In order to avoid that situation, assign a special drawer or bin to organize your office supplies. Only leave the items that you use frequently on your desk. Everything else should be thrown out.

spring cleaning sign

Tip 3: Find a place to store your temporary items

Temporary items can be defined as things like trade publications and magazines. To avoid getting them mixed up with important client files or documents, have an area designated for those items. When temporary items are placed in a single designated area, that allows you to monitor them as they continue to accumulate. That gives you enough time to determine which files to get rid of, older editions in particular.

Tip 4: Organize your computer

Another important task that is involved in office spring cleaning is tidying up and organizing your virtual desktop. Filing documents that you are most likely to use frequently or again is the best approach to take. If you have any old documents you don’t need any longer, then you should delete them. That will clear off your desktop, and also save you numerous hours that you would have spent looking for important documents.

Tip 5: Get Rid of Clutter

In order to keep your office tidy and clean at all times, you will need to do other things beyond cleaning. You will also need to get into the habit of ensuring that everything is always in the right place. If you tend to have a cluttered workspace, spring is a great time to make a new resolution for yourself and get into the habit of having better cleaning habits. Only keep your most essential belongings and get rid of any clutter that is unnecessary out of your work area.

For all your cleaning needs, contact us!

Goldstar logo

Tips for Making and Using DIY Hand Sanitizer

The Benenfits of Hand Sanitizer

Health organizations and experts all over the world have constantly been reminding people to wash their hands properly with soap to prevent COVID-19 infection, but hand sanitizers prove to have many benefits that make them a more appealing solution. The National Hand Hygiene Initiative has listed some of them as follows:

-It takes less than 30 seconds to clean your hands with a sanitizer, although it does not kill all the microbes like soap and water.

-Most hand sanitizer formulas are less irritating, and unlike soap and water, you do not need to use paper towels to complete the job.

-Also, there are places or situations where water and soap are not readily available such as meeting rooms.

In this article, we are going to take a look at how you can make your own hand sanitizer with readily available ingredients.

Alcohol is obviously the primary ingredient when it comes to making DIY sanitizer, as it’s pretty effective in killing various types of bacteria and viruses. However, the conventional vodka you may have at home may not be quite effective as an alcohol concentration of above 60% is required. Most alcoholic drinks usually have a 40 to 47 percent alcohol concentration, proving them ineffective. So, you’ll want to head out to the local pharmacy or hardware store and buy some isopropyl alcohol.

man using hand sanitizer

For Gel Sanitizer, You’ll Need:

-1-part aloe vera gel

-Three parts of isopropyl alcohol

-Several drops of tea tree oil

For Spray Sanitizer, You’ll Need:

-1 and 2/3 cups of isopropyl alcohol

-A tablespoon of hydrogen peroxide

-Two tablespoons of glycerin or glycerol

-1/4 cup of distilled or cool boiled water

Keep in mind that both iterations should be mixed using clean instruments, bottled, and left to sit for 3 days in order to kill any germs from the preparation process.

When & How Should You Use the Sanitizer?

According to the Public Health Agency of Canada, you should use sanitizer as per the following:

-Only when water and soap are not readily available

-If the hands are soiled, use towelettes to get rid of the soil, prior to applying the sanitizer

-Ensure the hands are dry as wet hands will only dilute the hand rub.

-Apply enough to cover your fingers and the surface of your hands.

-Rub the hands together until the hand rub completely evaporates.

hand washing

Situations to Wash Your Hands

It’s advisable that you wash your hands with water and soap not less than five times a day, including times when you wish to use hand rub. According to the Center for Disease Control & Prevention in the United States, you should wash your hands with soap and water in the following situations:

Before, during and after meal preparation

-Before eating food

-After using the restroom, cleaning up kids who have used the bathroom and after changing diapers

-Before and after treating a wound

-After coughing, sneezing and blowing your nose

-After touching an animal including your home pet

-Before and after being in contact with a sick individual

-After touching garbage

-After being in contact with any touchpoints such as buttons, handles, doorknobs, etc.

-If your hands are dirty, soiled, or greasy.

 With these tips, you should be able to increase your chances of staying safe from the virus.

Goldstar logo

Flatscreen TV Cleaning Tips

The flat-screen TV occupies a central place in a huge majority of homes big and small.

The Goldstar team sees TVs used in various settings — not just for watching TV, but for playing games, music, streaming video, and more. Now we offer you the benefit of our professional experience with these simple screen cleaning tips.

Cleaning TV

The question, then, is how to clean your flat screen effectively without causing any inadvertent damage? It’s not as hard as you might think!

1) Check Your User Manual

Like most appliances and devices, flat-screen TVs still come with manuals and/or instruction sheets. These should give you some basic cleaning guidance. The manufacturer’s preferred cleaning techniques will vary depending on the design of your TV. Scratches are an especially big concern for LCD screens, for instance, obliging you to avoid any abrasive cleaning products.

A lot of people turn to window cleaning products when they’re looking for a TV cleaner. There’s a logic to it, of course: TVs and windows are both sheets of glass, right? It’s true the both share the same basic material, but your TV is set apart by the special coatings applied to it.

The biggest risk of using a window cleaner on a flatscreen TV is that any ammonia in the product will hurt the screen’s anti-glare coating.

You need to consult with the documentation provided with your TV because you may even void your warranty if you clean the device incorrectly. Don’t hesitate to reach out to your TV manufacturer online or via phone if you want additional guidance on cleaning.

2) Use the Right Tools

The single best step you can take to minimize the risk of damaging your flatscreen is to approach the cleaning job with the right materials. We recommend the same key tool that the Goldstar Cleaning Services team uses: A soft-finish microfiber cloth that’s treated to minimize static electricity.

This is the same sort of cloth you’ve probably seen sold for cleaning eyeglasses, camera lenses, and portable electronic devices. Treat your television to the same level of pampering! You wouldn’t clean a high-end camera, a laptop, or a pair of designer glasses with a terrycloth rag, would you? Of course not.

Ideally, you should try cleaning your TV screen without using liquid cleansers or even water.

You can get more debris off than you might think with a dry microfiber cloth! Use a gentle, circular scrubbing motion across the whole screen. You’ll see fingerprints, dust, and other smudges come away easily.

There are, of course, dedicated products and even whole kits sold for cleaning flatscreen TVs. While these can be effective, our advice is to avoid chemical cleansers unless you have no other way to tackle your screen-cleaning job.

modern livingroom with flatscreen

3) Clean the Whole TV

The screen is, of course, the “business end” of your television. If the screen gets dirty enough, it will directly impede your enjoyment of your flatscreen. But don’t neglect the other parts of the device when it’s time to clean! You should spare some attention for these components, too:

* Speakers

* Cables

* Ports

* The Remote Control

Your entire TV, and its remote, should be wiped down regularly to keep dust away. The remote deserves some extra attention because our fingers tend to transfer a lot of oil, grease, and bacteria to the device. This isn’t the place for strong chemicals, though. You don’t want to scrub the lettering off your remote’s buttons, and this is a possibility with a lot of cleansers.

To simplify the remote-cleaning job, take the batteries out first. This will make it impossible to accidentally press a button while you’re wiping the remote. You don’t want to inadvertently change your DVR settings when you’re just trying to clean. Make an effort to remove dust from ports and the delicate grillwork of your television’s speakers.

There’s a reason to take extra time with this: Removing surface dust keeps it from working its way into the electronic innards of the device where it can cause real damage.

Safety Tips

Safety is an important concern whenever you’re cleaning something that uses electricity. Most flatscreen TVs are plugged into multiple devices along with a wall outlet or surge protector. When you’re doing a thorough cleaning, don’t just unplug the TV’s power; unplug its other connections, too.

It’s doubly important to power down your TV if you plan on using water or any sort of liquid cleanser on your set.

The shape of the modern flatscreen TV often puts it at risk of tipping and falling, and this risk is greatest when you are cleaning. If you know some of your entertainment devices, or the TV itself, are in especially precarious positions, move them to a more stable location before you clean. Many times, lowering the TV base to the floor is the easiest, safest way to prepare it for cleaning.

Maximizing Your TV’s Lifespan

A thorough cleaning is a great way to keep your television in tip-top condition, but you can take other steps to prolong its lifespan, too. Make a habit of turning your TV off when you’re not watching it. This conserves electricity, and it will even make the screen last longer. It’s also not a good idea to leave your screen paused for too long, as a still image may lead to permanent marks or discoloration.

Trust the Professionals!

Cleaning a TV thoroughly is a rather involved process. A lot of people just don’t have the time or energy to give the job the attention it deserves. You can trust the Goldstar cleaning team to take care of your electronics along with all of your other cleaning tasks, big and small; we’re happy to give you the expert help you need.

gss-logo-page-003

8 time-saving spring cleaning tips

There’s no way around it – spring cleaning takes work. But if you’ve been following our 31-day Spring Clean Challenge, you know that the most effective way to tackle a big job is to turn it into several smaller jobs. Well, here are eight more time-saving tips to help you along.
Put together a cleaning caddy to keep your cleaning supplies close by (istockphoto)
Make a cleaning caddy You can find these handy organizing buckets at most hardware stores. Fill the caddy with multipurpose cleaners, microfiber cloths and dish soap. That way, you’ll always have your basic cleaning tools on hand as you move about the house. Find a place for everything Tackle large piles of clutter by subdividing the task into smaller pieces. Label a set of Rubbermaid containers with general areas in your home – kitchen, bathroom, laundry room, bedroom, office, garbage etc. Before you begin cleaning a room, place clutter into the appropriate box and place the box it in the room where the items belong. Once you’ve finished your cleaning for the day, sort through each box and find a home for your stuff. Repeat as necessary. (This is also a good way to sort through items when planning a garage sale.) Move your furniture and appliances just enough to clean around them Unless you’re steam cleaning the carpets, there’s no need to clear a room of all furniture before you start. When vacuuming, simply move those big items a little to the left or to the right, vacuum the area previously occupied by the furniture and then move it back into place. As an additional task: check the pads on the feet of your chairs and couches, and replace any that are dirty to prevent scratching your floors.
A squeegee is your best friend when it comes to washing windows (istockphoto)
Use all the tools in your cleaning armada Do you use the attachments that came your vacuum cleaner? You should. The upholstery brush attachment is perfect for cleaning cushions and drapes, while the crevice attachment can get into tight spots with ease. You can also use an extending rod to clean up high. And when cleaning windows outside, save time (and a small fortune in paper towels) by using a squeegee with a pole attachment. Let water do your work Metal and plastic blinds can be removed from the window and cleaned outside. Scrub down the blinds with soapy water, then spray them clean with a garden hose. Lay the blinds flat on a towel to dry in the sun. Garbage cans, plastic furniture and toys can also be hosed down. Doing the work work outside will prevent you from accidentally bringing dirt and grime back in your house. Make a lost and found box Don’t waste time fretting about where to put that orphaned sock or how to neatly arrange your collection of extra shirt buttons. Instead, set aside a container for items that have no obvious home. Then you can resume your cleaning duties and worry about the little details later. Identify and eliminate clutter hotspots My personal hotspot is right next to the microwave on the kitchen counter. It’s a magnet for pieces of mail, flyers, old receipts and other documents I’m too lazy to sort. The trick to keeping such spaces clean is to remove the temptation; once you’ve cleared a hotspot, put something in its place – a lamp, a vase with some flowers or an art object – to block the clutter from re-appearing Get rid of dust at the source A lot of the dust in your house gets recirculated by dirty air filters, vents and fan blades.  Remove dust and dirt from ceiling fans and air-conditioner vents with a cloth and a vacuum with a soft nozzle attachment. Replace your air filters regularly, according to the manufacturer’s instructions.

8 big cleaning mistakes you’re (probably) making

It’s spring cleaning season again. As you prepare to tackle some of the toughest cleaning jobs in your house, it’s worth taking a look at some of the things we do (or don’t do) that make the job more difficult than it has to be. Here’s our list of the top 8 most common cleaning mistakes, in no particular order: 1. You spray and wipe in five seconds. The ingredients in most household cleaning agents take time to act, so if your cleaning regiment follows the five-second rule, it’s possible you’re not getting the full effect. Check the label for the “dwell time,” which will tell you how long to leave the cleaner. 2. You don’t use rubber gloves. You may have them, but how often do you actually use them? The chemicals in cleaners can irritate your skin or be absorbed into your body. Your best bet is to put on rubber gloves whenever you use chemical cleaners, and then wash your hands immediately afterward. 2. You don’t clean your dishwasher. You can’t clean dishes with a dirty dishwasher, and contrary to popular belief, simply running the dishwasher while it’s full won’t clean it. Every month or so, run your dishwasher empty on the hottest setting, with nothing but a shallow bowl of white vinegar on the top shelf. The vinegar will thoroughly disinfect your dishwasher’s innards. 3. You clean down low, but not up high. Ever wonder where all that dust comes from? Most likely, it starts up high in places you never clean – the ceiling fan, on top of the fridge, on the highest shelves of your bookcase – and gets scattered about the room. Take some extra time to clean those hard-to-reach spots, and you’ll be rewarded with less housework all-around. 4. You don’t throw out your sponges and dishcloths often enough. Rather than helping to wipe up messes, that old sponge or cleaning rag may actually be spreading germs and bacteria. If they get wet on regular basis, you should be replacing them every two weeks, tops. 5. You scrub spills out of your carpet. All you’re doing is pushing the stain deeper. Try blotting instead. For nasty spills, pour some soda water on the affected area first to draw out the stain. 6. You use paper towels for everything. They shouldn’t be used for every job. When cleaning glass, coffeepots and mirrors, consider using coffee filters, which won’t leave streaks or lint behind. To clean window shades, use an old dryer sheet – it will create a static layer that repels dust. 8. You don’t clean your pillows. Yes, pillows can be cleaned. In fact, they should be cleaned at least twice a year to prevent them from becoming breeding grounds for bacteria. Most down and synthetic fibre pillows can be machine-washed (check the label). Use a mild liquid detergent rather than a powder to avoid leaving behind residue, and run the rinse cycle twice to ensure a thorough clean. Dry the pillows on low heat, and throw in a couple of tennis balls wrapped in socks to re-fluff them.